There are many skillsets that any good chef has, and that any aspiring chef must master. These include knife skills, good sanitation practices, building flavors, menu and recipe development, labor and food cost control, management skills and the application of heat. By “the application of heat,” I mean how to cook various foods in a variety of specific ways so that the end result is consistently great food.
There are a limited number of traditional cooking techniques, each of which is considered to be either a dry-heat or moist-heat cooking method. In the dry-heat camp are grilling, broiling, deep-frying, pan-frying, sautéing, smoking, roasting and baking. Moist-heat methods include boiling, poaching, steaming and braising.
All of these techniques have been around a very long time and each has its own moment to shine. Certain products thrive more with one technique than another. A juicy, tender strip steak will be great after spending a couple of minutes on a hot grill or sauté pan, but would be chewy and dry if braised for several hours. A chuck roast, on the other hand, will be flavorful and melt in your mouth after a long braising, but would be comparatively tough and stringy if cooked quickly on a grill. Besides getting the most out of each product you cook, another advantage to having all of these techniques in your arsenal is that you can get many different, excellent dishes from the same product. For instance, shrimp can be boiled, fried, grilled or sautéed, all with great results.
As a bonus, if you put a little effort into learning the basics of how these various techniques work, you’ll do a much better job of getting the most out of any recipe you follow. Let’s take a look at two of the most popular methods, one dry and one moist: frying and braising.
Frying
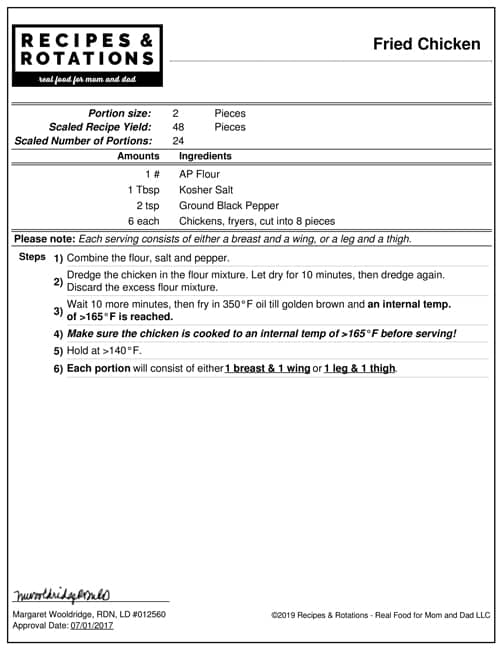
Frying is a dry-heat method of cooking. (“Dry,” here, is about the absence of water, not the absence of liquid.) The goal is a crisp, golden-brown crust with a moist, almost “steamed” interior. The three most common ways to form the crust are: 1) a quick dredging in seasoned flour and/or cornmeal, 2) a batter, such as tempura, and 3) dipping the product in flour, then a liquid (some combination of buttermilk, milk and beaten eggs) and then breadcrumbs. It’s very important to always fully pre-heat the oil to between 325°F and 375°F before adding any product, and then to maintain that temperature. Also, don’t overcrowd the pan or fryer and change the oil when necessary.
Oil is a very good medium for cooking because it is such an efficient conductor of heat and naturally makes complete contact with irregularly-shaped foods. Because of this, less experienced cooks can get more consistent results when frying than with other cooking methods, assuming an experienced chef sets the temperature of the oil and determines the product size. For the most part, all the cook has to do is wait for a nice, golden brown color and it’s done. Of course, an insta-read thermometer should always be used to check for proper internal temperatures.
There are two styles of frying: pan-frying and deep-frying. Pan-frying is done in a skillet (cast iron is a good choice) with just enough oil to come about half way up the side of the product. When the first side is golden brown turn it over and cook till the two sides match. Check the internal temperature and, if necessary, finish, uncovered, in a 350°F oven. In deep-frying, the product is totally immersed, usually in a deep fryer or rondeau. Deep-frying is similar to boiling with a big difference: the temperature. In frying, the normal temperature range is 325 -375°F. Water doesn’t get hotter than 212°F. Because browning doesn’t occur below 285°F (even if you boil something all day long, it won’t brown), when the objective is golden-brown, frying beats boiling.
Fried items are best right out of the oil. If necessary, just-fried items can be held at temperature in a 225°F oven for brief periods, or chilled and then reheated in a 350°F oven at service. Always reheat uncovered on a rack to preserve at much crispness as possible.
Because many residents love fried foods, even considering calorie and cholesterol issues, these items deserve an occasional appearance on any menu. As it’s been said, “Anything good is better fried.”
Braising
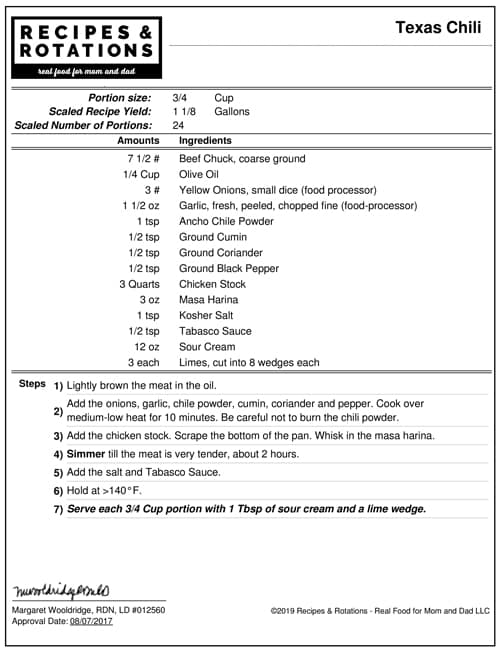
While frying accentuates the positives of inherently moist, tender items such as seafood, chicken and delicate vegetables through the use of high heat and short cooking times, braising is just the opposite. Braising, a moist-heat method of cooking, lends depth of flavor, juiciness and amazing tenderness to the toughest cuts of meat through long, slow cooking. The gist of braising is to cook the product in a flavorful liquid for a long time at low heat, slowly and gently making it tender and releasing its flavor into the liquid. Frequently, the liquid is later reduced to make a concentrated, wonderful sauce. Meats are often seared first, creating an attractive “crust” and adding flavor. Stews and pot roast are typical examples of braising.
Tough cuts of meat from the shoulders and legs of animals, like chuck and shanks, are tough because they get a lot of exercise and contain a lot of connective tissue, called collagen. In braising, over time and at low temperature (185-195°F), this collagen is broken down into gelatin, which retains moisture and flavor, acts as a thickener and adds succulence and richness to the dish. To get the full effect of braising on this connective tissue, care must be taken to keep the temperature of the braising liquid at a very low simmer, and to allow sufficient cooking time – from two to six hours depending on the item. The low cooking temperature also prevents unwanted fat from being permanently incorporated into the sauce.


